
Okay, so, I’ve been wanting to get a cargo trailer for my motorcycle for a while now. You know, for those longer trips where you just need more space for your stuff. I started looking around, and man, those pre-built trailers can be pricey! So, I thought, “Why not try building one myself?” It seemed like a fun project, and potentially a way to save some cash.
First thing I did was some digging online to get some ideas. I found a bunch of forums and articles talking about DIY motorcycle trailers. Seems like a lot of folks go the customizable kit route. These kits apparently give you the basic frame and parts, and you put it all together. Sounds easy enough, right?
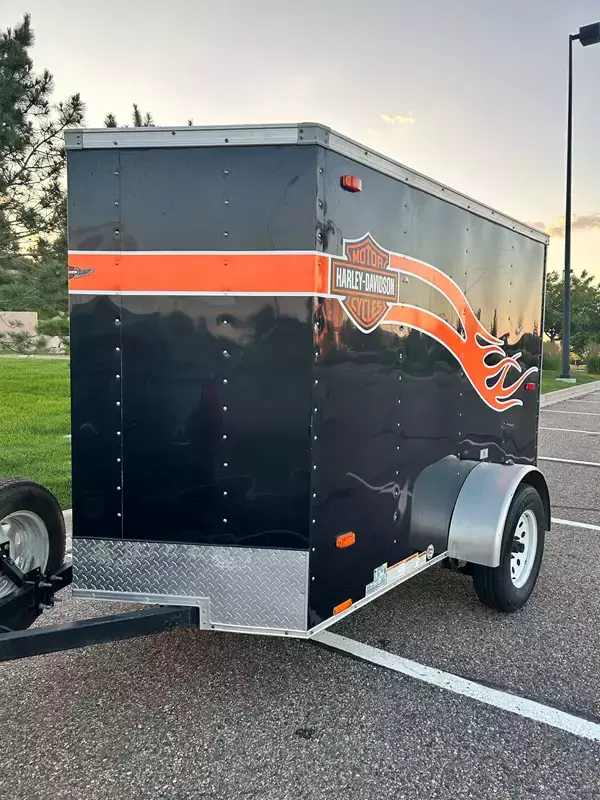
Then I had to figure out what size I needed. I saw that the usual sizes for enclosed trailers are like, 5, 6, 7, and 8.5 feet wide, and they can be anywhere from 8 to 32 feet long. Obviously, I didn’t need anything that big! I’m just one guy, not a whole moving company. Plus a big one needs a bigger motorcyle to pull it. I ended up deciding on a smaller one around 6 feet wide. That seems like a good amount of space for my gear.
Choosing the Kit
- Looked at a bunch of different kits online.
- Compared prices, materials, and what was included.
- Finally settled on one that seemed like a good balance of quality and price.
Next, I started gathering all the materials. The kit came with most of the big stuff, but I still needed to grab some tools, some extra wiring for the lights, and things like that. Once I had everything laid out, it was time to start assembling. I spent a lot of time in my garage, so I’m pretty good at it. And I have the right tools for this kind of thing.
Assembly Time
- Followed the kit instructions (mostly).
- Bolted the frame together. That was pretty straightforward.
- Attached the axle and wheels.
- Wired up the lights. This part was a little tricky, but I got it done.
The kit instructions were okay, but sometimes they were a little vague. But it was no big deal, really. Bolting everything together was pretty simple. The axle and wheels went on without much fuss. The wiring for the lights, though, that took some patience. I had to make sure I connected everything correctly so the brake lights and turn signals would work right. I’ve never been good at working with wires, you know.
Finishing Touches
- Added a plywood floor to the inside.
- Sealed up any gaps to keep things weatherproof.
- Mounted a cargo box on top for extra storage.
After the main structure was done, I added a plywood floor to the inside. Then I went around and sealed up any gaps with some caulk, just to make sure rain and stuff wouldn’t get in. I didn’t put it on just to make it rainproof. It’s actually pretty solid. And lastly, I mounted a lockable cargo box on top for extra secure storage. You know, for things like my helmet, gloves, and other smaller stuff.
Testing It Out
Once everything was built, I hooked it up to my bike and took it for a spin around the block. Felt pretty good! It tracked well behind the bike, and I didn’t really notice the extra weight too much. I even practiced backing up a little, which, yeah, that’s going to take some getting used to. It’s not easy, that’s for sure.
Overall, I’m really happy with how it turned out. It wasn’t too difficult to build, and I think it’s going to be perfect for my needs. I’m already planning my next long ride, and I can’t wait to really put this trailer to the test! It’s gonna be so useful, I know it. It’s time to make that trip!


