
Okay, folks, let’s talk about putting a bike rack on your SUV’s roof. I’ve been meaning to do this for ages, and I finally got around to it. Here’s how the whole thing went down.
First off, I did a ton of reading online. See, there’s a bunch of different kinds of these racks, and I wanted to make sure I got the right one for my car and my bike. I spent hours on this, seriously, but it was kind of fun and I definitely learned some stuff!
There’s like, ones that hold the bike by the fork, and ones that hold it by the frame. It seems like the hitch-mounted racks are better for SUVs, but since I already have stuff on my hitch I thought that the roof was my only option. I decided to go with roof-mounted because, hey, it seemed like a good challenge and I liked the way it looked. There are even some that hold the whole bike upright, wheels and all. And each kind has its own set of pros and cons.
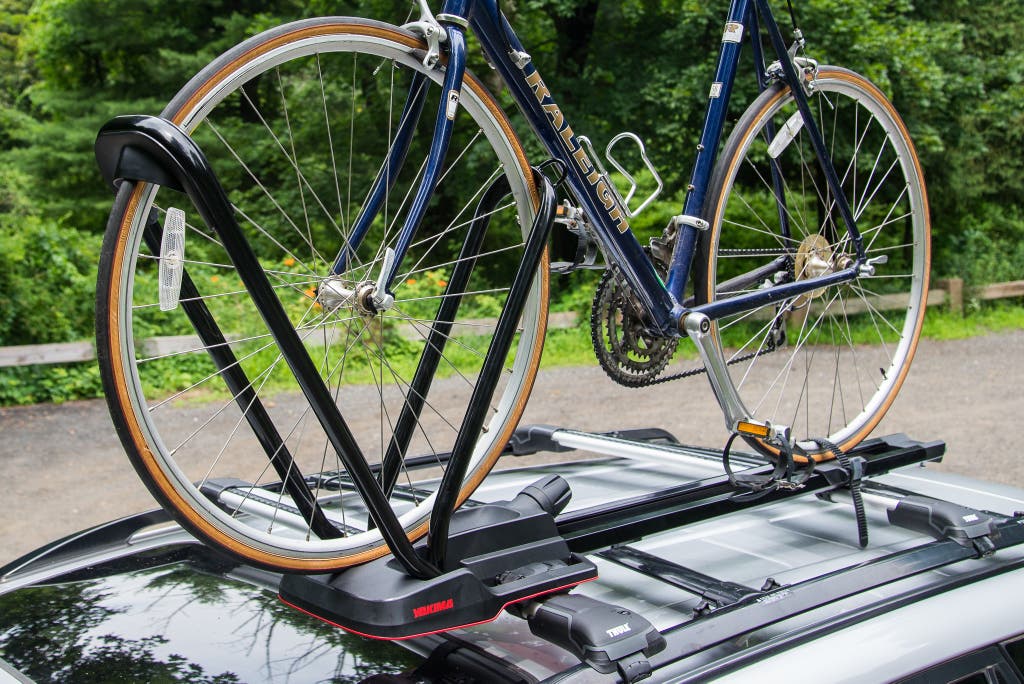
After all that research, I finally picked one out. I went with a frame-mount because it seemed like the most secure option for my ride. I ordered it online, and it showed up a few days later in this big box. And, in retrospect, it was a pretty good deal, at least at the time when I ordered it.
Now, I’m no mechanic, but I’m pretty handy. So, I decided to install this thing myself. The instructions that came with it were okay, but honestly, I ended up watching a few videos online to get a better idea of what I was doing. Just felt more comfortable watching someone else do it first.
Getting all the parts laid out was the first step. Then I had to put together the base of the rack, which actually wasn’t too bad. The tricky part was lifting it onto the roof of my SUV. That thing was heavier than I thought! I managed to get it up there without scratching anything, which was a win.
Next, I attached the rack to the crossbars on my roof. This involved a lot of tightening screws and making sure everything was lined up just right. It was a bit of a pain, but I took my time and double-checked everything as I went. There were a few points where I almost gave up but the excitement of maybe being able to carry my bike around kept me going.
Once the base was secure, I mounted the part that actually holds the bike. This was pretty straightforward. I just had to follow the instructions and make sure all the straps and clamps were in the right place. Finally after all that assembly, I was ready to put my bike on the thing. And guess what, after some adjustments, it fit!
Finally, I put my bike on the rack. It was a little wobbly at first, but I tightened everything down, and it felt pretty solid. I even took it for a test drive around the block, and it held up great! I felt like a new man with this thing, it was pretty cool!
My Thoughts
- Research is key: Don’t just buy the first rack you see. Figure out what kind you need first.
- Installation can be tricky: If you’re not comfortable with tools, maybe get some help, or watch some videos before starting. It took some getting used to.
- Test it out: Before you go on a long trip, make sure the rack is secure and your bike is properly attached. Just drive it around the block and see how it handles.
All in all, I’m pretty happy with how it turned out. Now I can take my bike anywhere I want! And after that, I went on a nice bike trip through the mountains with my friends. It was really nice. If you’re thinking about getting a roof rack for your SUV, I say go for it. Just do your homework and be prepared for a little bit of work.


